It’s been a while since I posted any updates on the Pristine Auto s13 so I figured why not get one in before the year ends. I’ve actually been fairly busy on the car for the past couple months and unfortunately have run into some issues along the way. After getting the head and block back together and buttoning all the little stuff up it was time to get the car running with the AEM EMS base calibration file. This is my first standalone ECU so I knew going in that it might be a little tricky to get a handle on things. Fortunately, though AEM has a pretty in-depth PDF which helped out a lot with the basic stuff.
EMS Instructions: Series 1 and Series 2
And here’s a link to some KA and SR calibration files: 30-66XX EMS Calibrations
Anyone running an AEM ECU on their s13 knows about the Cam wheel issue that the AEM has. Well as advised by the manual the Series 2 has to have the 24 tooth Cam wheel in place for it to work. From my understanding though, with the Series 1, it’s not required and only needed if you’re seeing inconsistencies in the higher RPM range. So after everything was in and ready to go I figured it was only a matter of following the instructions…well that wasn’t exactly the case. Here’s there issue that I ran into:
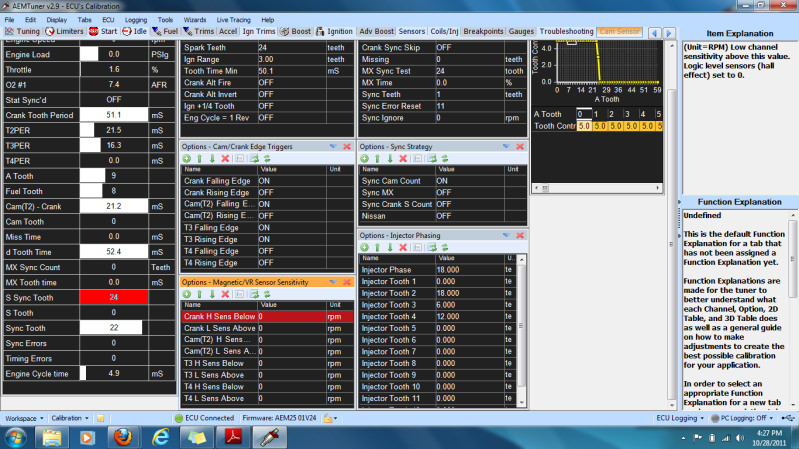
On the printout from their forums for syncing the 24 tooth wheel, it states that in the Ignition Phasing Options under Ignition Syn you should subtract 1.92 from the current value that’s loaded with your base map. And you should also do the same in the Injector Phasing Options under Injector Phase, except this time only subtract 2 from the current value listed. With these settings I could not for the life of me get the damn to Stat Sync’d ON. It would just crank and crank…no burp or sign of life. So at this point, I’m thinking it could be anything since I just put the motor back together. I double-checked everything from timing to the igniter chip. After I realized that I wasn’t even getting spark I had a feeling it had to do with my Ignition settings.
Just to be sure it was that I removed the AEM and the 24 tooth cam wheel, replaced it with the OEM one, and my old Enthalpy tuned ECU, popped the MAFS back on, and sure enough, it started up for a split second. At that point, I was sure that it had to do with my EMS settings. After about a day of messing with values to no avail, I decided to start all over from scratch. This time around I only messed with the bare minimum (corresponding values under Setup Wizard and Throttle Range) and decided not to touch the Inj. and Ign. Phasing Options at all. After everything was in order it finally started up and idled! It idled rich and rough but idled nonetheless.
Although those settings worked for me I’m not sure if that will work for everyone, so do it at your own risk.
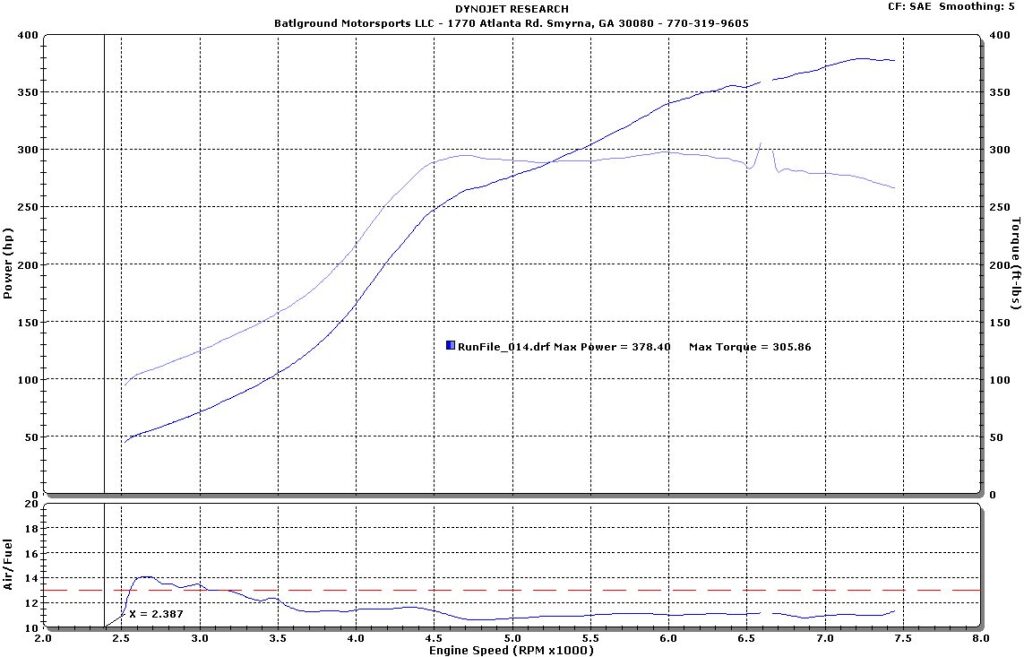
From there I got on the phone with Batlground Motorsports down in Georgia and scheduled a tune.
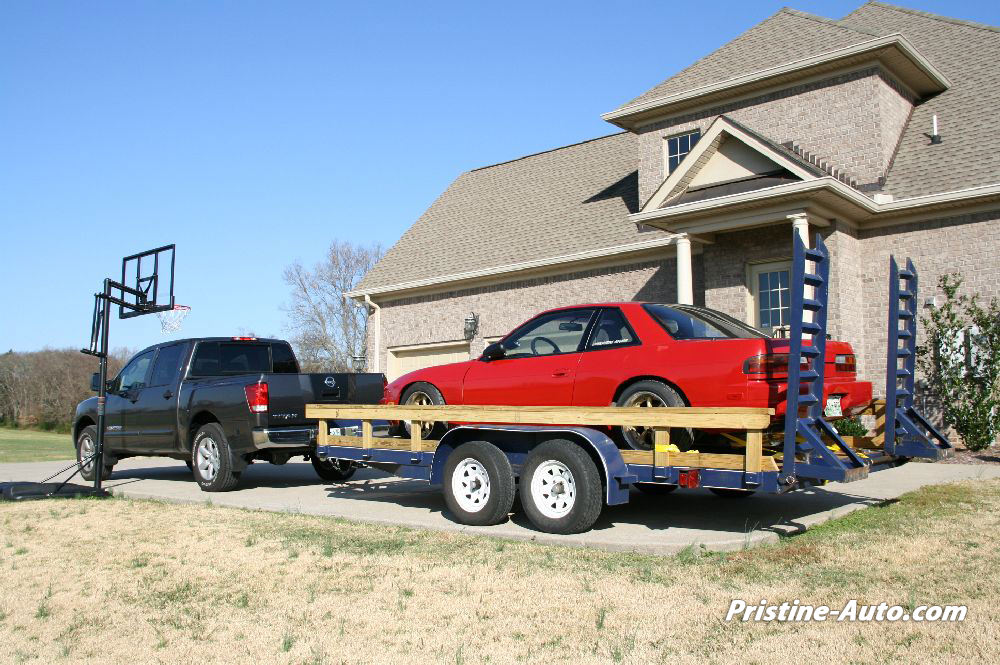
I managed to get a hold of a trailer from a good buddy of mine, Shubash, who was nice enough to let me take it all the way down to Atlanta. Check out Shubash’s s15 in the April 2010 issue of Import Tuner—thing is super clean! Anyway, here’s my car loaded up and ready to roll!
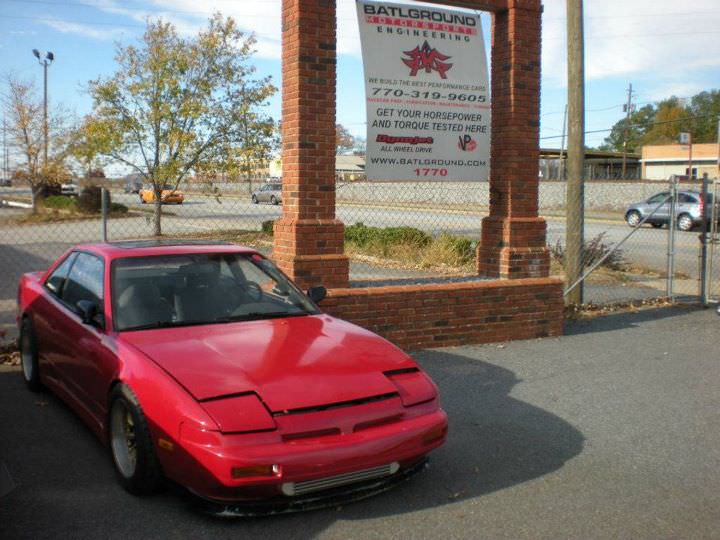
Here it is at the shop!
Unfortunately, I got down there later than expected so I had to leave the car there over the weekend. The good news is that Dan was able to tune it over the weekend and it put down 378hp & 305tq at about 7500 rpms on 18psi. Now the bad news is that he said my setup should have broken 400hp at around 18psi…..and piston 4 took a crap. I guess this is what I get for cutting corners and not building the bottom end while I had the head off and pushing it too far for the condition it was in. Lesson learned, now moving on haha.
Where I am Now

After getting the car back and unloaded I went back to work removing everything…again. While the motor is out I went ahead and pushed the car out of the garage to do a quick preliminary degreasing. This thing was nasty I tell you. When I first put the motor in about 3 years ago I was in too much of a hurry (I know…I should stop rushing my builds) to clean out the bay. It had so much caked up dirt on it!.
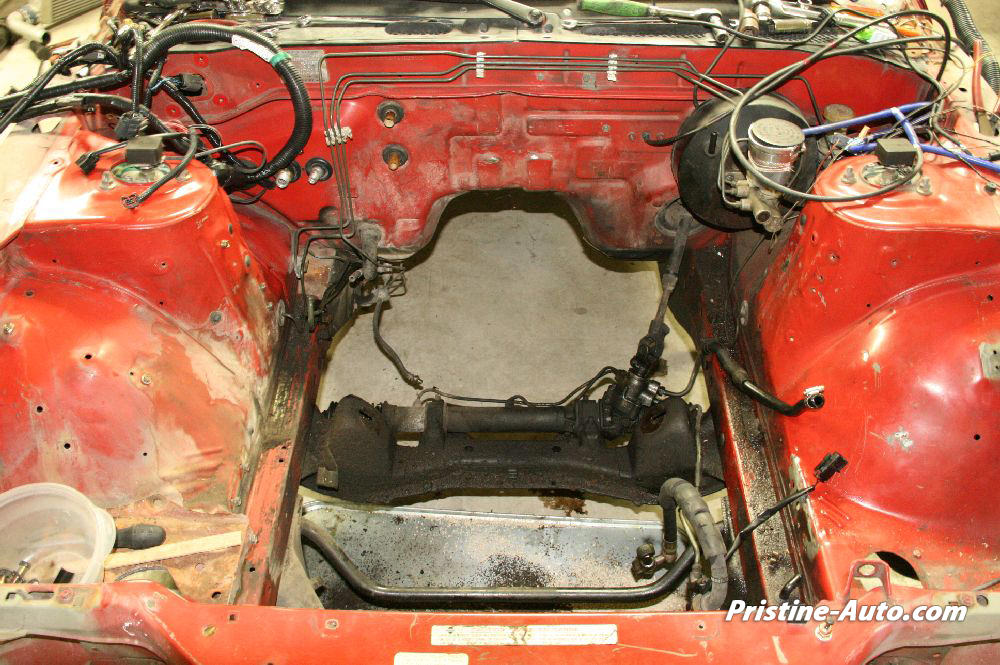
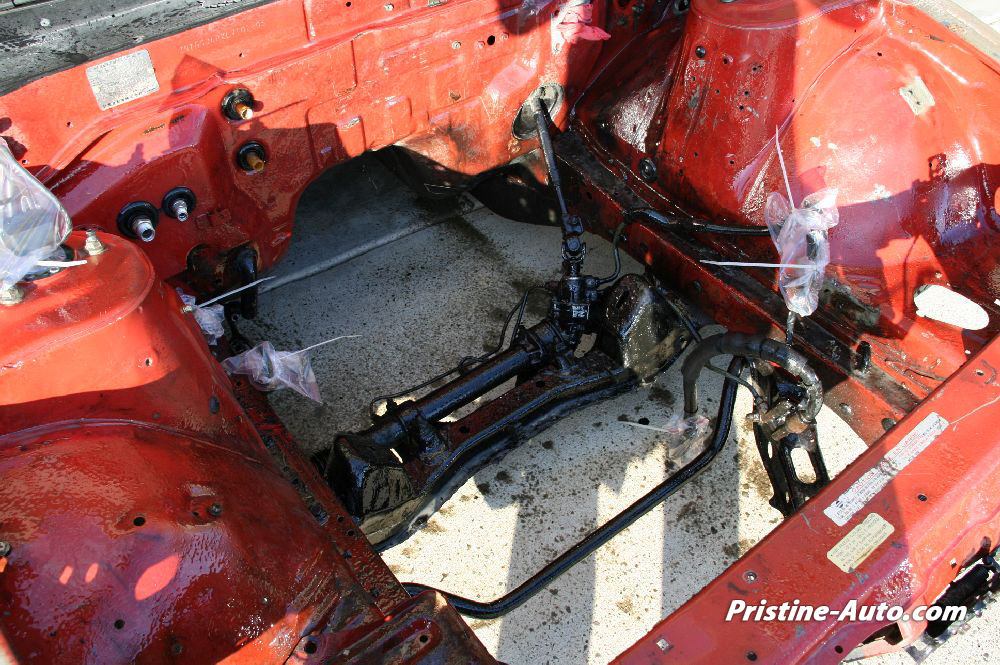

So after spraying everything down and blowing the excess off with a nozzle I wheeled it back in to start removing the suspension so I can get some stuff freshly powder coated.
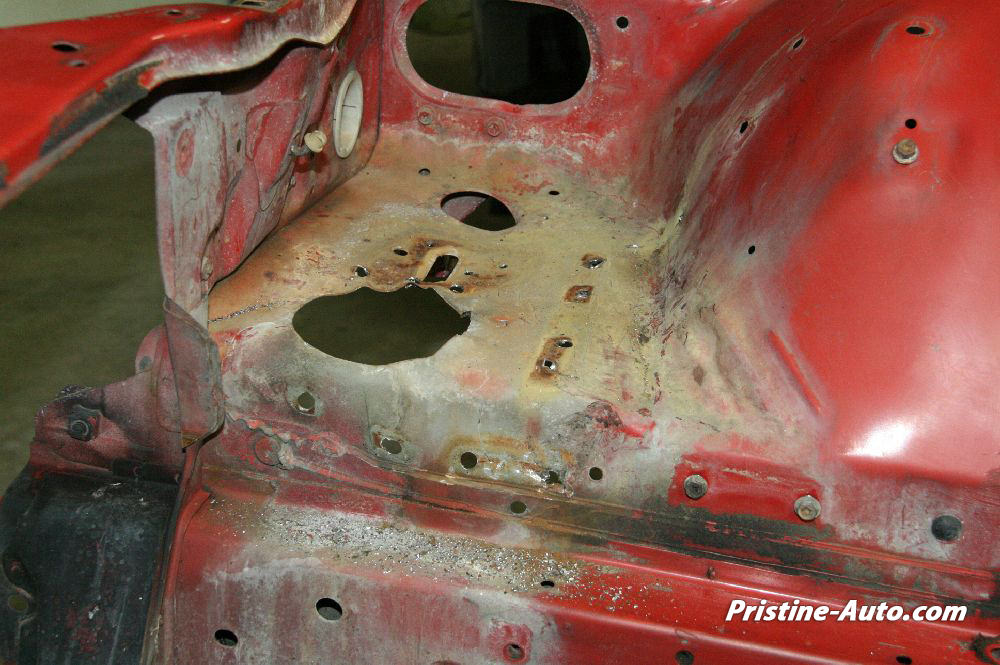
Once I’m ready to start paint prep I’ll wipe the bay down by hand to make sure there is no dirt or oil left before I start sanding. For engine bay prep I started with that godawful rusted out battery tray that haunts us, 240sx owners.
I’ve seen a lot of people pry, cut, and hack at their battery trays, but if you look closely you’ll see that it’s held in place with a series of small spot welds. After locating all of them I drilled them out and from there it just fell right out. It only took a few minutes and it’s a lot less labor-intensive. Normally I’d use a spot weld cutter bit, but in this case, I will be cutting out the lower part anyway so I just drilled right through both pieces.
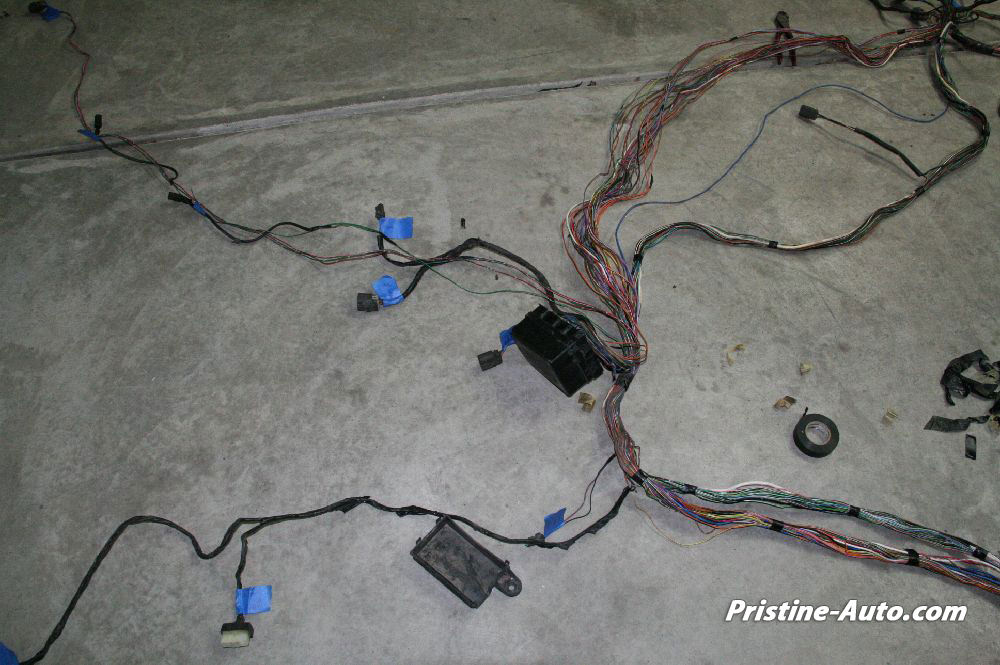
Well, what started as simply a bottom end build, has turned into a full-on project. I figure it’s wintertime and there’s not much going on in terms of events so why not get started. With the bay empty, I decide to clean up the wiring and relocate the engine bay harness into the cabin so everything is nice and clean up front.
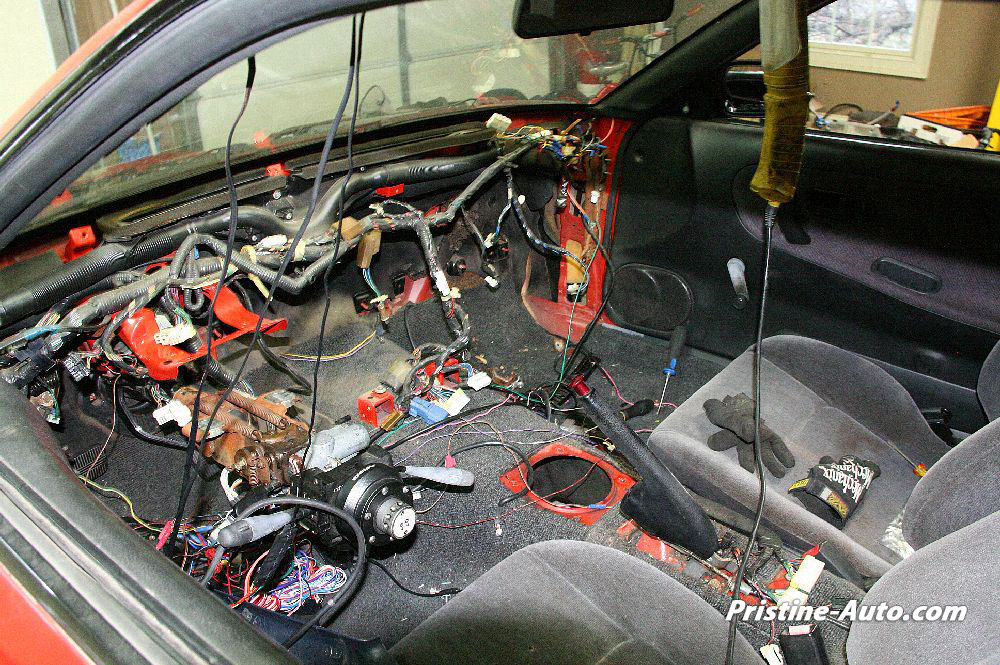
This post is long enough so I’ll address that in another post. In the meantime, I’ll leave you with the de-loomed wiring harness that I started on. I started out by labeling everything then figuring out what will go where and I’m currently in the process of removing what I don’t need.